persistent disk storage in ehcache

Requirement – To have persistent storage in ehcahce

Solution-
cacheManagerPeerProviderFactory –It is used for saying “Hello, I’m here!” and allows to discover the other CacheManager in the cluster and be discovered by other nodes.

It accepts only two arguments (class and properties).

cacheEventListenerFactory — It is used for receiving notification about cache update by other nodes in cache cluster.

bootstrapCacheLoaderFactory —It is used for starting cache system and synchronize the cached elements in the cluster.

package com.techartifact.caching;

import java.util.ArrayList;
import java.util.List;

import net.sf.ehcache.Cache;
import net.sf.ehcache.CacheManager;
import net.sf.ehcache.Element;

// this is main class.
public class MainClass {

	/**
	 * @param args
	 */
	public static void main(String[] args) {
		// TODO Auto-generated method stub
		MainClass mainClass = new MainClass();
		mainClass.runMainClass();
	}

	private void runMainClass() {
		// TODO Auto-generated method stub
		int TOTAL=3;
	         CacheManager cacheManager = new CacheManager();
		Cache myCache = cacheManager.getCache("persistentEhcacheNew");

		System.out.println("the size of my cache at startup is: "+myCache.getSize());
		System.out.println("disk store size: "+myCache.getDiskStoreSize());
		System.out.println("memory store size: "+myCache.getMemoryStoreSize());
	        System.out.println("memory DiskStoreSize size: "+myCache.getDiskStoreSize());
	        System.out.println("boot strapCacheLoader is Asynchronous: "+myCache.getBootstrapCacheLoader().isAsynchronous());
                System.out.println("cache status: "+myCache.getStatus());
	        System.out.println("cache name: "+myCache.getName());
                List listOfKeys= myCache.getKeys();
                //myCache.removeAll();
                if(myCache.getDiskStoreSize()>0){
               for (Object temp : listOfKeys) {
                        System.out.println((String)temp.toString());
	                Element element = myCache.get(temp);  
	                     
	                      if (element != null) {  
	                       System.out.println(temp + " is in the cache!!!"); 
	                       String val = (String)element.getValue().toString();
                               System.out.println(val + " value is in the cache!!!");
                              }
	            }
                }else{
              
		System.out.println("now add 3 elements to cache");
                    for (int i = 0; i < TOTAL; i++) {
                            DataObject dataObject = new DataObject();
                           dataObject.setRandomFloat(Randomizer.returnRandomFloat());
                            dataObject.setRandomString(Randomizer.returnRandomString());			
                            Element element = new Element(i,  dataObject.getRandomFloat());
                            myCache.put(element);
                   }
                }

		cacheManager.shutdown();
		
	}

}


BootstrapCacheLoaderFactory – An abstract factory for creating BootstrapCacheLoader instances. Implementers should provide their own concrete factory extending this factory. It can then be configured in ehcache.xml.

Create a MyBootstrapCacheLoaderFactory that extends BootStrapCacheLoaderFactory, and override method load(EhCache ehcacheparam)to bring the cache up on server startup

package com.techartifact.caching;

import java.util.List;
import java.util.Properties;

import net.sf.ehcache.CacheException;
import net.sf.ehcache.Ehcache;
import net.sf.ehcache.Element;
import net.sf.ehcache.bootstrap.BootstrapCacheLoader;
import net.sf.ehcache.bootstrap.BootstrapCacheLoaderFactory;

// 
public class MyBootstrapCacheLoaderFactory extends BootstrapCacheLoaderFactory implements BootstrapCacheLoader{
	

	@Override
	public BootstrapCacheLoader createBootstrapCacheLoader(Properties properties) {
		// TODO Auto-generated method stub
		return new MyBootstrapCacheLoaderFactory();
	}

	@Override
	public Object clone() throws CloneNotSupportedException {
		// TODO Auto-generated method stub
		return super.clone();
	}
	public boolean isAsynchronous() {
		// TODO Auto-generated method stub
		return false;
	}
	public void load(Ehcache myCache) throws CacheException {
		// TODO Auto-generated method stub
		System.out.println("load your cache with whatever you want....");
		List keys = myCache.getKeys();
		for (int i = 0; i < keys.size(); i++) {
			Element element = myCache.get((keys.get(i).toString()));
		}
		System.out.println("load complete!");
	}


}
Custom session timeout warning popup in Webcenter portal 11.1.1.8 using jquery

Hi All,

Requirement – To show customised session time out warning popup in webcenter portal builder.

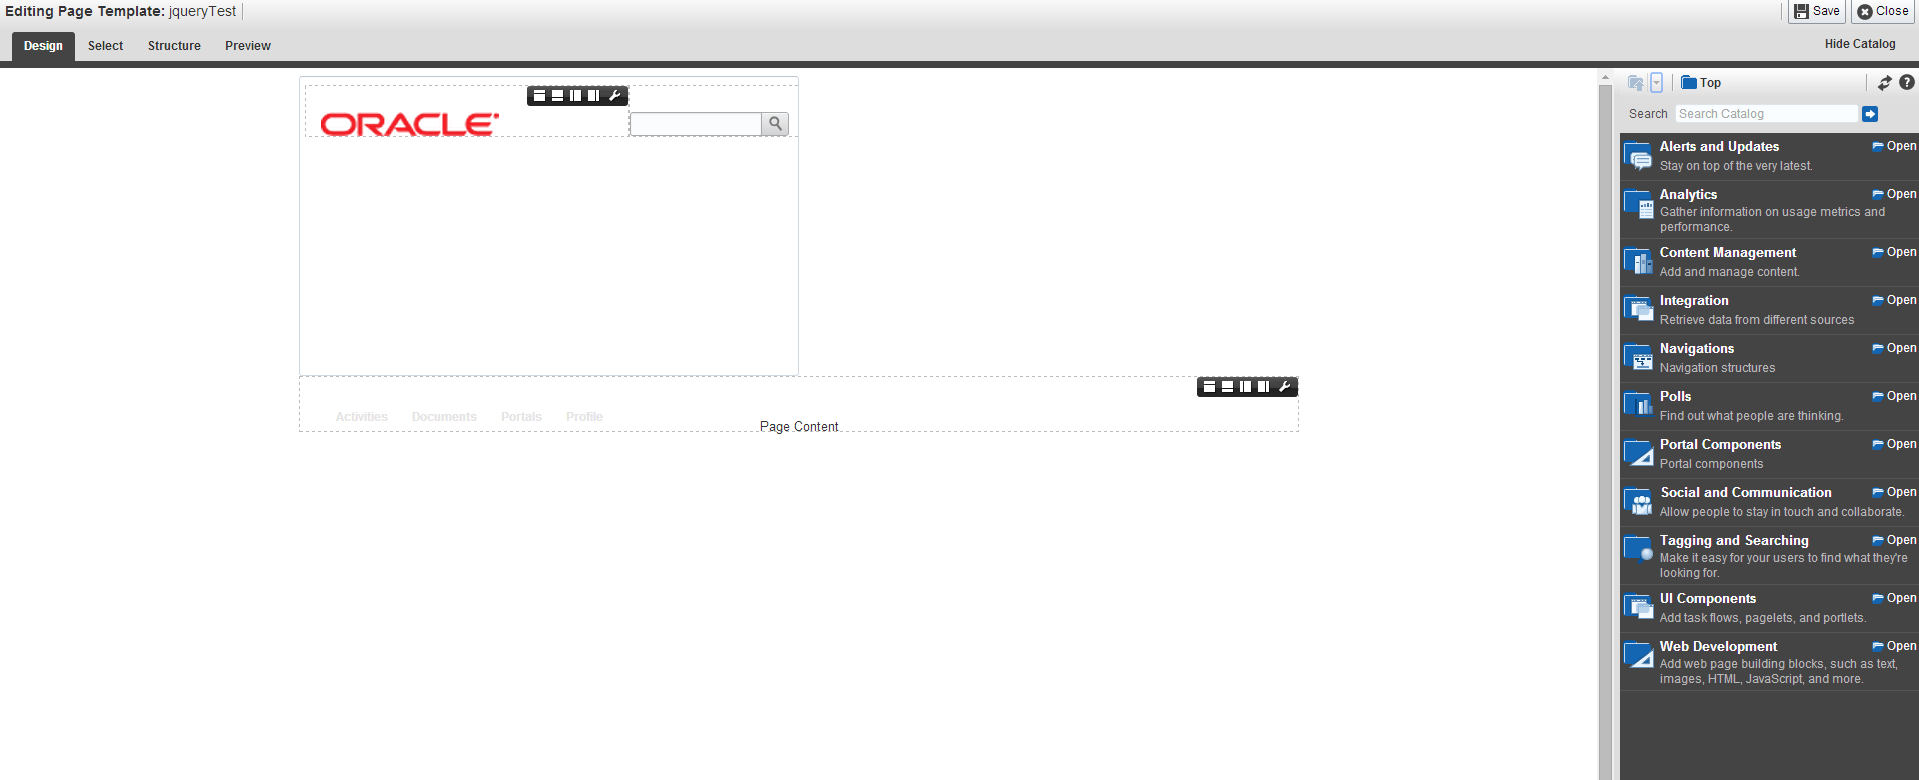
Solution- Edit your template-

editpagetemplate

In the composer, open web development and add an html markup anywhere in the template.
Edit that markup and add below code as the value.

Below snippet uses normal javascript.

<!doctype html>
<html lang="en">
<head>
<meta charset="utf-8">
<title>Dialog Box Witout Close Button</title>


</head>
<body>
<div id="dialog"  title="Dialog Title"></div>
<script>
var resetTime_int;
function resetTimer(){
    if(resetTime_int) window.clearTimeout(resetTime_int)
    resetTime_int=window.setTimeout(function (){
    if(document.getElementById('dialog').innerHTML = 'You have ' + (timeoutCount * 3000)/1000 + 'seconds until timeout' ;)     
    location.reload()
    }, 1000*60*2)
}

resetTimer()
document.onmousemove=resetTimer
document.onkeyup=resetTimer
</script>
</body>
</html>

html

Following snippet with Jquery

<!doctype html>
<html lang="en">
<head>
<meta charset="utf-8">
<title>Dialog Box Witout Close Button</title>
<link rel="stylesheet" href="http://code.jquery.com/ui/1.10.1/themes/base/jquery-ui.css">
<script src="http://code.jquery.com/jquery-1.9.1.js"></script>
<script src="http://code.jquery.com/ui/1.10.1/jquery-ui.js"></script>

</head>
<body>
</head>
<body>
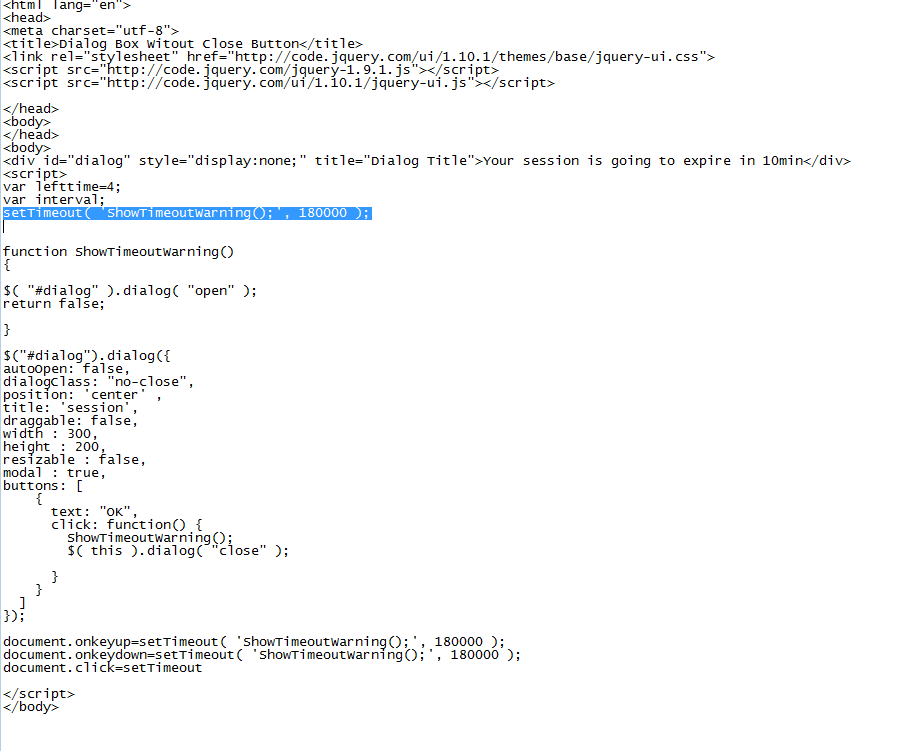
<div id="dialog" style="display:none;" title="Dialog Title"></div>
<script>
var lefttime=3;
var interval;
interval = setInterval('change()',60000);


function change()
{
   lefttime--;
   if(lefttime<=2) {
$( "#dialog" ).dialog( "open" );
return false;

}
}
$("#dialog").dialog({
autoOpen: false,
position: 'center' ,
title: 'session',
draggable: false,
width : 400,
height : 200,
resizable : true,
modal : true,
});

JS

With jquery you can make it more beautiful with these dialog options.

Thats it. You can change the time to show popup for idle user.

Happy learning with Vinay in techartifact

Remote debugging mit JDeveloper

Environment: JDeveloper 11.1.1.6
Für den lokalen Weblogic Server/Admin Server:
In order to allow for remote debugging, we need to edit the domain startup script startWebLogic.sh and specify JVM options for starting the server in order to support remote debugging of ADF applications.
The domain startup script can be located in the
%MIDDLEWARE_HOME%\user_projects\domains\\bin directory, where %MIDDLEWARE_HOME% .
Add the following line in JAVA_OPTIONS:
set REMOTE_DEBUG_JAVA_OPTIONS=-Xdebug -Xnoagent -Xrunjdwp:transport=dt_socket,address=4000,server=y,suspend=n
for example
JAVA_OPTIONS=”-Xdebug -Xnoagent -Xrunjdwp:transport=dt_socket,address=4000,server=y,suspend=n -Dweblogic.security.SSL.trustedCAKeyStore=”/home/oracle/Middleware/wlserver_10.3/server/lib/cacerts” ${JAVA_OPTIONS}”
export JAVA_OPTIONS
Für managed Server (SPU):
Not startWebLogic.sh edit! That would have an impact on all managed servers! Instead, the parameters -Xdebug -Xnoagent -Xrunjdwp: transport = dt_socket, address = 4000, server = y, suspend = n in the Weblogic Admin Console under Settings – Server – – Server Start – add arguments:
debug

Configuring JDeveloper
The next step is to enable the remote debugging feature for your project in JDeveloper. To do this, go to your project’s properties. Select the Run/Debug/Profile section, and click the Edit button for the “default” setting. This will bring up a dialog where you can check the Remote Debugging option.

Enable debugging from Weblogic Console
Environment–>Servers–><>–>Debug
Select the required flags and click on Enable/Disable.
Enable the level of debug you need, e.g.: security, servlet, jdbc.This change does not require weblogic Server Restart.
You need Make sure the severity is set to debug in weblogic console:
Environment > Servers > MyServer > Logging >Advanced > Minimum severity to log: Debug
This change requires server restart.

Editing the script

Setting Up setDomainEnv.cmd
Near the top of your file add the following line to enable debugging.

echo ——————————————————————
echo Setting Debug to true
set debugFlag=true
echo ——————————————————————

Locate the following line locate further down the file and make a note of the port number.You can change the default port number as well.

rem set the port number
if “%DEBUG_PORT%”==”” (
set DEBUG_PORT=8453
)