Multiple file upload with Jquery in ADF/Webcenter

Hi All,

File upload in Oracle ADF is done with af:inputFile component.

To implement file upload functionality, follow the below steps:

1. add af:inputFile component to the form.
2. set usesUpload property of the af:form element to true.
3. create binding of inputFile and its valueChangeListener in managed bean.
4. write code to implement file upload and display its content in text area as shown in below example:

fileupload1

standard implementation of inputfile is like

jspx code:

 <af:panelGroupLayout id="pgl1" layout="vertical">
              <af:panelGroupLayout id="pgl2" layout="horizontal">
                <af:inputFile label="Upload File" id="if1"
                              binding="#{pageFlowScope.UploadBean.inputFile}"
                              valueChangeListener="#{pageFlowScope.UploadBean.FileUploadVcListener}"
                              autoSubmit="true"/>
                <af:spacer width="10" height="10" id="s1"/>
                <af:commandButton text="Upload" id="cb1"
                                  disabled="#{pageFlowScope.UploadBean.inputFile.value == null ? true : false}"
                                  partialTriggers="if1"
                                  actionListener="#{pageFlowScope.UploadBean.onUploadFile}"/>
              </af:panelGroupLayout>
              <af:spacer width="10" height="10" id="s3"/>
              <af:panelFormLayout id="pfl1" partialTriggers="cb1">
                <af:inputText label="File Name" id="it2" columns="30"
                              readOnly="true"
                              value="#{pageFlowScope.UploadBean.fileName}"/>
                <af:inputText label="File Content" id="it1" rows="10"
                              columns="100" readOnly="true"
                              value="#{pageFlowScope.UploadBean.fileContent}"/>
              </af:panelFormLayout>
              <af:spacer width="10" height="10" id="s2"/>
            </af:panelGroupLayout>

Managed Bean Code:

import java.io.IOException;
import java.io.InputStream;
import java.io.StringWriter;
import javax.faces.event.ActionEvent;
import javax.faces.event.ValueChangeEvent;
import oracle.adf.view.rich.component.rich.input.RichInputFile;
import org.apache.commons.io.IOUtils;
import org.apache.myfaces.trinidad.model.UploadedFile;

public class UploadBean {
    private RichInputFile inputFile;
    private UploadedFile file;
    private String fileContent;
    private String fileName;
    private InputStream inputstream;

    public UploadBean() {
        super();
    }

    public void FileUploadVcListener(ValueChangeEvent valueChangeEvent) {
        resetValue();
        file = (UploadedFile)valueChangeEvent.getNewValue();
        try {
            inputstream = file.getInputStream();
        } catch (IOException e) {
            e.printStackTrace();
        }
    }

    public void onUploadFile(ActionEvent actionEvent) {
        if (file != null && inputstream != null) {
            fileName = file.getFilename();
            StringWriter writer = new StringWriter();
            try {
                IOUtils.copy(inputstream, writer);
                fileContent = writer.toString();
            } catch (IOException e) {
                e.printStackTrace();
            }
        }
        if (inputFile != null) {
            inputFile.resetValue();
            inputFile.setValid(true);
        }
    }

    public void resetValue() {
        if (fileName != null)
            fileName = null;
        if (fileContent != null)
            fileContent = null;
        if (inputstream != null)
            inputstream = null;
    }

    public void setInputFile(RichInputFile inputFile) {
        this.inputFile = inputFile;
    }

    public RichInputFile getInputFile() {
        return inputFile;
    }

    public void setFile(UploadedFile file) {
        this.file = file;
    }

    public UploadedFile getFile() {
        return file;
    }

    public String getFileContent() {
        return fileContent;
    }

    public String getFileName() {
        return fileName;
    }
}

Now if you want to have validation then you do validation for file type,file size or any other validations in ValueChangeListener. One of biggest problem is , in large applications, File will be uploaded to a temporary location and if the ere is large user then huge sizes of files will be stored in server location. That can create issue.Because ADF Faces will temporarily store incoming files (either on disk or in memory), by default it limits the size of acceptable incoming requests to avoid denial-of-service attacks that might attempt to fill a hard drive or flood memory with uploaded files. By default, only the first 100 kilobytes in any one request will be stored in memory. Once that has been filled, disk space will be used. Again, by default, that is limited to 2,000 kilobytes of disk storage for any one request for all files combined. Once these limits are exceeded, the filter will throw an EOFException . Files are, by default, stored in the temporary directory used by java.io.File.createTempFile() , which is usually defined by the system property java.io.tmpdir . Obviously, this will be insufficient for some applications, so you can configure these values using three servlet context initialization parameters:

  <context-param>
    <!-- Maximum memory per request (in bytes) -->
    <param-name>oracle.adf.view.faces.UPLOAD_MAX_MEMORY</param-name>
    <!-- Use 500K -->
    <param-value>512000</param-value>
  </context-param>
  <context-param>
    <!-- Maximum disk space per request (in bytes) -->
    <param-name>oracle.adf.view.faces.UPLOAD_MAX_DISK_SPACE</param-name>
    <!-- Use 5,000K -->
    <param-value>5120000</param-value>
  </context-param>
  <context-param>
    <!-- directory to store temporary files -->
    <param-name>oracle.adf.view.faces.UPLOAD_TEMP_DIR</param-name>
    <!-- Use an ADFUploads subdirectory of /tmp -->
    <param-value>/tmp/ADFUploads/</param-value>
  </context-param>

  <!-- This filter is always required by ADF;  one of its functions is 
          file upload. -->
  <filter>
    <filter-name>adfFaces</filter-name>
    <filter-class>oracle.adf.view.faces.webapp.AdfFacesFilter</filter-class>
  </filter>

. Ideally, we should have client side validations , which will ignore all irrelevant files.

So if you use this component, you should delete your file after cancel upload process or after persist the file from temporary locations.

So today, we will discuss another approach for bypassing this scenario. We will use one jquery plugin to have client side validation for size, extension etc.

I will be using this jquery plugin , There are many, you can choose anyone.

Lets look at implementation now
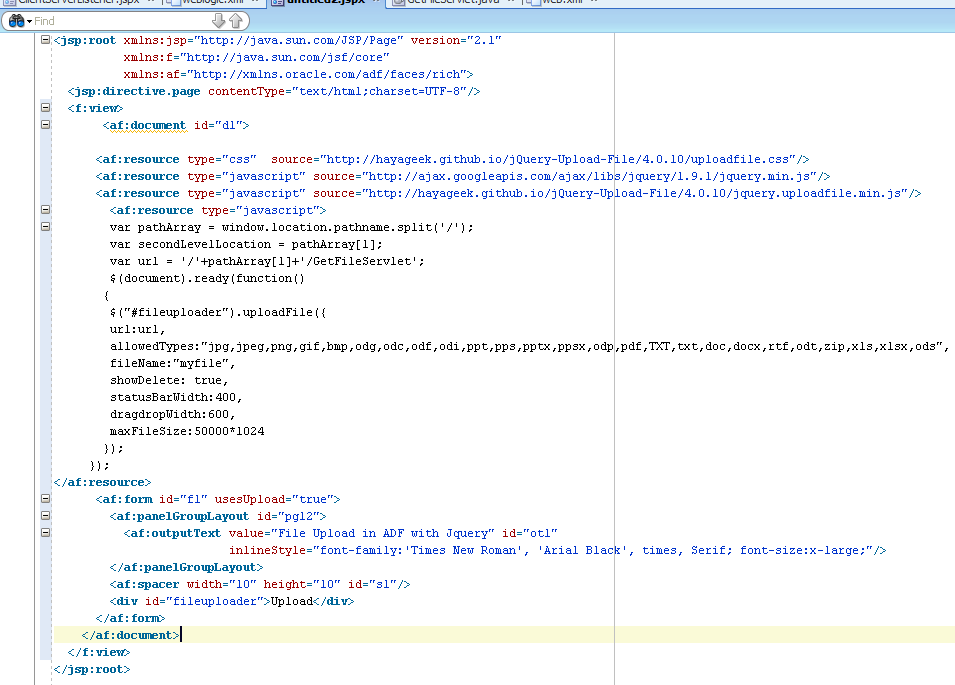
This will be my jspx page
uploadPng

First thing, you need to include css and JS file as below

 <af:resource type="css"  source="http://hayageek.github.io/jQuery-Upload-File/4.0.10/uploadfile.css"/>
 <af:resource type="javascript" source="http://ajax.googleapis.com/ajax/libs/jquery/1.9.1/jquery.min.js"/>
 <af:resource type="javascript" source="http://hayageek.github.io/jQuery-Upload-File/4.0.10/jquery.uploadfile.min.js"/>

And you need to write js in your page as below

   <af:resource type="javascript">
        var pathArray = window.location.pathname.split('/');
        var secondLevelLocation = pathArray[1];
        var url = '/'+pathArray[1]+'/GetFileServlet';  // this will give you post method call to this url
        $(document).ready(function()     // standard jquery ready function
       {
        $("#fileuploader").uploadFile({ 
        url:url,
        allowedTypes:"jpg,bmp,ppt,pps,pptx,pdf,TXT,txt,doc,docx,rtf,odt,zip,xls,xlsx", // you can define allowed extension type.
        fileName:"myfile",
        showDelete: true,   // if you want to show delete icon for each uploaded file
        statusBarWidth:400,  
        dragdropWidth:600,
        maxFileSize:50000*1024   // add maximum upload size for file.
       });
     });
</af:resource>

We will add div as below

 <div id="fileuploader">Upload</div>

When you upload then call will go to GetFileServlet , which is mapped in web.xml .
I am also using Apache common file upload to handle multitype request.
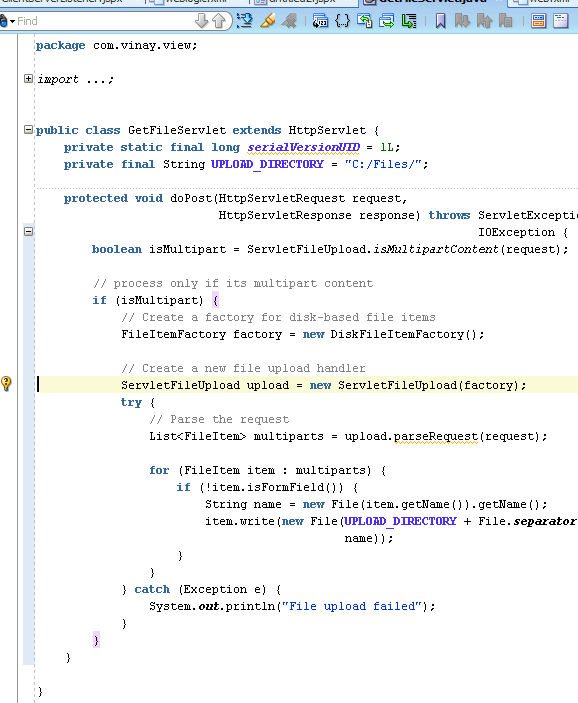
servlet

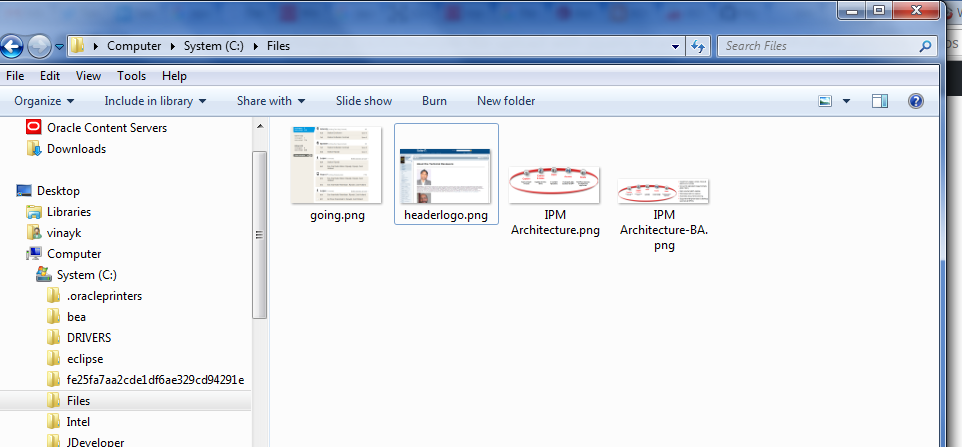
You can store these document in db, webcenter content using RIDC. for sample purpose, I am storing these documents in file store
in C drive.

You also need to define mapping of servlet in web.xml as below
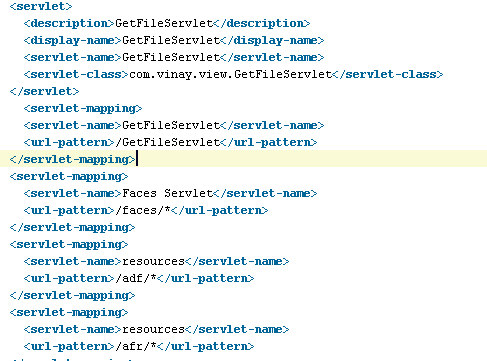
urlmapping

Now run the application.

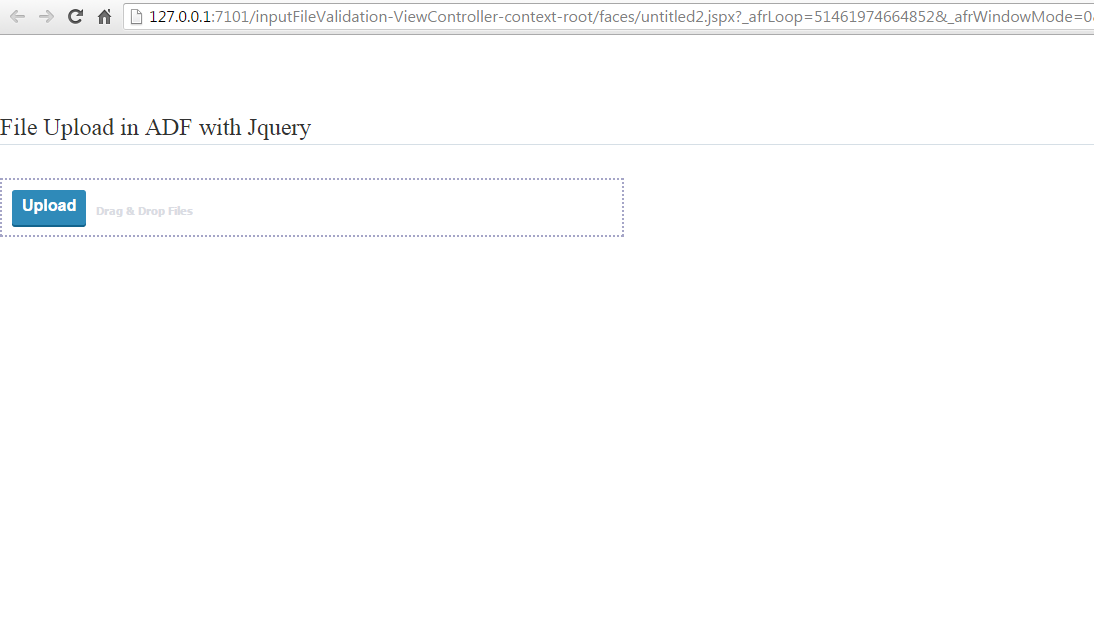
Output

upload11

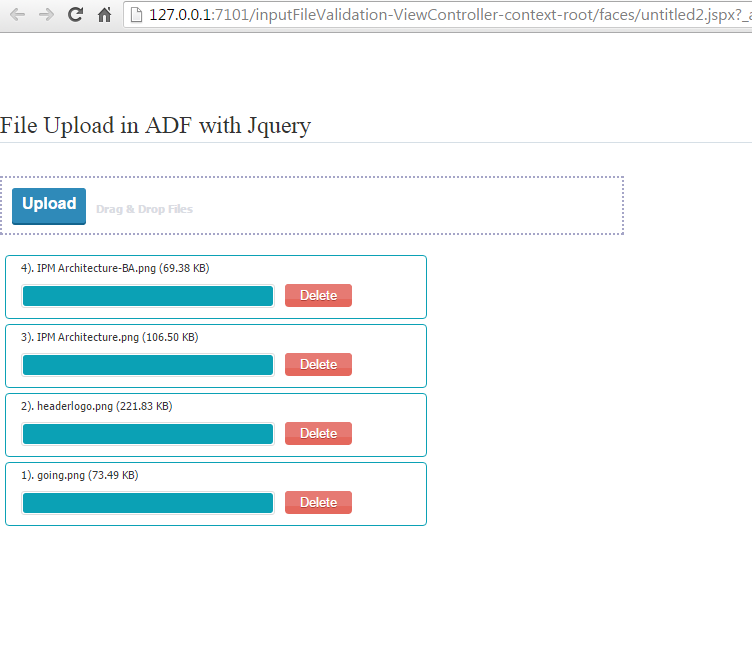
Now select some files and upload

upload22

great. File uploaded to system.

uploadedd

now upload some invalid file,I tried file with eddx extension and you will get validation happened on client side.
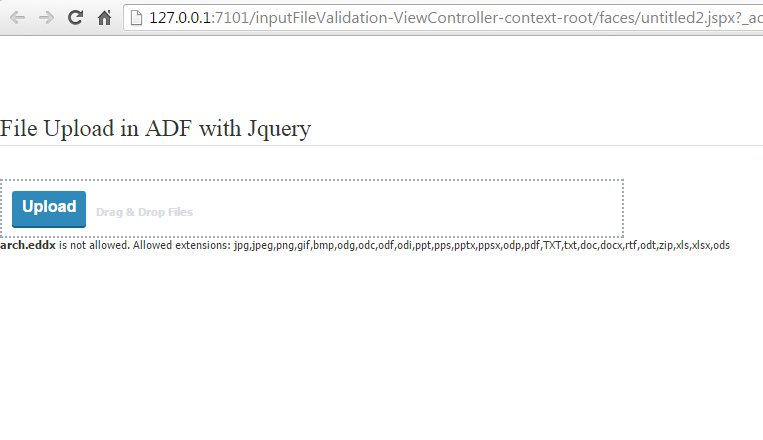
upload555

Now try uploaded with large file. I reduce the size limit
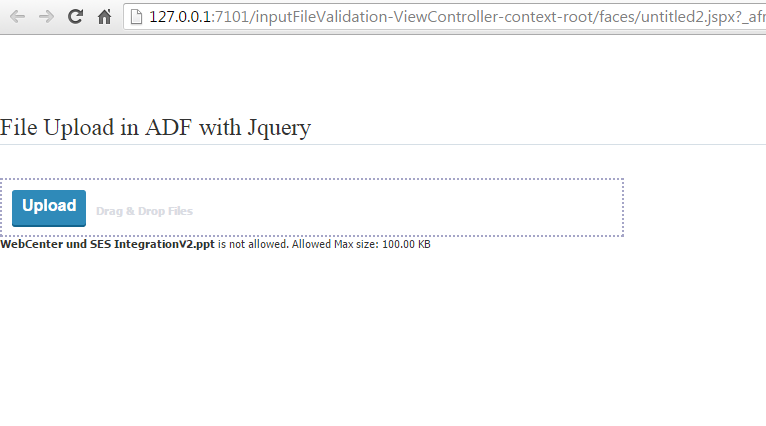
uploaded555

Storing file is file system is just for demo. You should store these files in webcenter content using RIDC.

So it is very simple and easy to use and give lot of freedom to use following features.

jQuery File upload plugin has the following features.
Single File Upload
Multiple file Upload (Drag & Drop)
Sequential file upload
File Restrictions
Localization (Multi-language)
Sending Form Data
Adding HTML elements to progressbar
Custom UI
Upload Events
Delete / Download Uploaded files
Image Preview
Show previous uploads

Well that all. Happy uploading in ADF/webcenter.

Insights of Angular.js

Angular.js is a JavaScript framework that appeared late on the scene in 2012, learning from initial offerings, and with the backing of Google, able to change the playing field somewhat. The Google resources injected into its development were large, and resulted in a very powerful product with massive ongoing support.AngularJS is an open-source web application framework, maintained by Google and community, that assists with creating single-page applications, one-page web applications that only require HTML, CSS, and JavaScript on the client side. Its goal is to augment web applications with model–view–controller (MVC) capability, in an effort to make both development and testing easier.

The library reads in HTML that contains additional custom tag attributes; it then obeys the directives in those custom attributes, and binds input or output parts of the page to a model represented by standard JavaScript variables. The values of those JavaScript variables can be manually set, or retrieved from static or dynamic JSON resources.

However, the power and purity of MVC implementation came with a big price – complexity. Angular is not for the faint hearted, with some scary and often perverse syntax to stumble through. You will also find that the power keeps drawing you back into it’s grasp, but you will repeatedly find that Angular tutorial sites teach from the inside out, rather than from where you are to where you want to go. The Google reference site is particularly terse and obscure to newcomers.

Why AngularJS?

AngularJS is a MVC framework that defines numerous concepts to properly organize your web application. Your application is defined with modules that can depend from one to the others. It enhances HTML by attaching directives to your pages with new attributes or tags and expressions in order to define very powerful templates directly in your HTML. It also encapsulates the behavior of your application in controllers which are instanciated thanks to dependency injection. Thanks to the use of dependency injection, AngularJS helps you structure and test your Javascript code very easily. Finally, utility code can easily be factorized into services that can be injected in your controllers. Now let’s have a closer look at all those features.

Notable directives
AngularJS directives allow the developer to specify custom and reusable HTML tags that moderate the behavior of certain elements.

ng-app
Declares an element as a root element of the application allowing behavior to be modified through custom HTML tags.
ng-bind
Automatically changes the text of an HTML element to the value of a given expression.
ng-model
Similar to ng-bind, but allows two-way data binding between the view and the scope.
ng-class
Allows class attributes to be dynamically loaded.
ng-controller
Specifies a JavaScript controller class that evaluates HTML expressions.
ng-repeat
Instantiate an element once per item from a collection.
ng-show & ng-hide
Conditionally show or hide an element, depending on the value of a boolean expression. Show and hide is achieved by setting the CSS display style.
ng-switch
Conditionally instantiate one template from a set of choices, depending on the value of a selection expression.
ng-view
The base directive responsible for handling routes that resolve JSON before rendering templates driven by specified controllers.
ng-if
Basic if statement directive which allow to show the following element if the conditions are true. When the condition is false, the element is removed from the DOM. When true, a clone of the compiled element is re-inserted.

How Angular works

The key powers of Angular.js are :

Live, bi-directional binding of web display data to the data model
Separation of data, logic and presentation code
An HTML-based, extensible syntax
Standard functionality in a single, small footprint JavaScript file

1. Bi-directional data binding

If you type into this box you will see the 2-way data binding in action :

The input field is connected to the data model, so the value you typed was immediately stored in that model. The same value was immediately reflected back on the right in a display field that was also linked to the model.
If you are familiar with JavaScript, you may rightly point out that this data reflection effect can be achieved by injecting the current input box content into a div after it, by attaching an onKeyUp event. Angular will likely use this event also. But the point here is that with Angular, you define relationships and let Angular determine such event processing behind the scenes.

In effect, Angular web pages are better described as state machines rather than event driven ones. The mindset to think state-wise rather than event-wise or procedurally is one of the hard parts about acclimatising to Angular.

2. Separation of data, logic and presentation code

The diagram below shows the basic structure of a typical Angular-based web site :

Overview

You do not need to use a database of course – your data model could simply be hard coded. But most sites will be using Angular to better manage the complexity of data retrieval, storage and display. JavaScript arrays and objects are used to represent the database data in the data model.

Database data can be preloaded into the model in full or in part, with asynchronous retrieval and storage requests handled via Angular code, as you keep the database and data model in sync.

By largely distilling out the HTML code, with its hooks to the data model, changes to the appearance are less likely to require data handling changes.

3. An HTML-based, extensible syntax

You are not limited to the Angular supplied HTM extensions such as ng-model above. For those wary of standards, Angular recognises that this extension does not rigidly adhere to naming standards, so they support the data- prefix to bring it into line, like this : data-ng-model.

By encapsulating the effect of these new HTML elements and attributes, reusable code can be developed more easily. Write once, deploy many times is always an ideal we can strive for.

4. Standard functionality in a single, small footprint JavaScript file

Whilst there are additional Angular JavaScript files such as its ui suite (angular-ui.js), the core functionality is contained in a relatively small footprint file. A homogenous approach to the MVC framework idea. Whilst Angular is rich and complex, you are essentially developing with one set of tools, not a suite of unrelated applets.

Angular operation

Angular operates by traversing the web page Document Object Model (DOM). It interprets the element tags and attributes in conjunction with the data model and controller logic to dynamically alter the HTML code and its rendering. It supplies all the event handling in support of the live two-way data binding.

Part of the complexity of Angular is that much of its internal mechanics are exposed to the developer. This is needed, alas, in order to perform some data control logic. But they really should have provided more intelligible wrappers to hide the internals better. It is likely that you will therefore become involved in the internal linking and compiling that Angular carries out. I will, however, try to keep the explanations simple, not least because I found the concepts hard to grasp myself.

Reference – http://www.angularbasics.co.uk/#

Happy Learning with Angular.js in techartifact. Stay tuned for more on Angular.js

Sencha Cmd featues and Usage

Sencha Cmd is an excellent cross platform command line tool which can automate many tasks around the life cycle of our Sencha ExtJS and Sencha Touch framework based appliacations from generating a new project to deploying it for production.

Sencha Cmd tool features:
This tool provides us lots of useful features like:
Code generation: Sencha Cmd can generate entire applications and also can extend those applications with the ExtJS MVC components.
JS compiler: Provides a framework aware JavaScript compiler which knows the semantics of Sencha frameworks and can also produce minimal footprint builds of the application source.
Web server: Provides a lightweight web server which can serve files from the application directory.
Packaging: Provides native packaging to convert Sencha Touch based applications in to a mobile application that has device level functionality and can be distributed in App stores.
Management system: Provides distributed package management system to easily integrate the packages created by others or within Sencha package repository.
Build Scripts: Build script for the applications and packages with “before” and “after” extension so that we can easilty customize the build process.
Tuning: Provides powerful code selection tools that we can tune our application for the final build like what should be included, determining common codes among the pages and also partition the shared coded into packages.
Workspace: Helps in sharing frameworks, packages and code between the applications.
Image capture: Can convert the CSS3 features into sprites for old browsers.
Flexible configuration: Easily configurable command options.
Logging: Useful logging system which helps us understanding and troubleshooting many poroblems.
Third party softwares: Sencha Cmd tool includes a compatible version of Compass, Sass, and Apache Ant within it.
Code generation hooks: Page specific or can be shared by all the pages available in the workspace. Like we may need to check the coding conventions or the guidelines as the new classes are generated.

Command line reference
sencha ant
This command invokes the embedded version of Apache Ant with helpful properties back to the Sencha Cmd.

Command options:
• –debug, -d – Enables the debug level messages for Ant.
• –file, -f – Ant file to execute. The default file is build.xml.
• –props, -p – Properties for the Ant script as name value pairs like:
name=value,…
• –target, -t – The target(s) to be executed through the Ant script.
• –verbose, -v – Enables verbose level messaging for Ant.

Command syntax:
sencha ant [options] targets…
In the above command the targets represents the Ant script to execute

There are multiple command .Check on http://docs.sencha.com/extjs/4.2.2/#!/guide/command

Happy learning.