Modify or Extending the Shell Template in Oracle ADF – techartifact

Requirment – To modify the template that can be UI shell template or Dynamic Shell template or Any other template which in form of jar in your application

Solution- In one of the requirment i have to create binding for panelspiltter in the template.jspx which in template.jar . I have unjar it modify and implemented the changes and again made to jar.

XXX.jspx in oracle-page-templates-ext.jar. Below is the step by step procedure to do this:

Copy the oracle-page-templates-ext.jar from %MiddlewareHome%\jdeveloper\adfv\jlib\ folder
Create a new folder in drive C like C:\temp\jdev\ and paste the copied jar.
Extract the contents of the jar.Open command prompt and navigate to the C:\temp\jdev folder

You can change the folder by “cd” command
For going to parent folder you can use “cd ..” .
Enter the below command for unjar :

 
jar xf oracle-page-templates-ext.jar 

or 

jar xf JarName.jar 


If you that jar command cant recogzied then we need to add the java bin folder path into the “Path” system variables. Ex. “C:\Oracle\Middleware\jdk160_24\bin;”
You can do by right the my computer and go to properties ,go to advance tab .Seach path variable and edit and add this above path as well

If this command work well. then you need to delete the existing jar from temp folder you created. We do this so that we can easily repack a jar later.
Open the jdevloper and open that XXX.jspx . modify or whatever changes you want to make do it.save and close it.Repackage the file in a jar. Open a command prompt navigate to the temp folder we created earlier then run the following command:
Now you have to pack as a jar .Use this command

 
jar cfM0 oracle-page-templates-ext.jar *    
0 (Zero)

or
or 

jar cfM0 JarName.jar 

You can give the jar a different name if you like.Now you will Modify libraries and classpath. Open your application in JDeveloper.Right-click your ViewController project and click project properties.Remove the existing Templates in the classpath entries.Add the jar file that we created in the step above.

Happy Learning with Techartifact

getting binding of component from one managed bean to another

Today i got one of the requirment to get the binding of some component which is binding in another managed bean.
This is something tedious requirment i have.. Well in JSF 2.0 you can get very easily by using below code

 
        FacesContext context = FacesContext.getCurrentInstance();
        BEAN bean = (RegionNavigationListener)context.getApplication().evaluateExpressionGet(context, "#{BEAN}", BEAN.class);


You can write above code as below as well

FacesContext fctx = FacesContext.getCurrentInstance();
Application application = fctx.getApplication();
ExpressionFactory expressionFactory = application.getExpressionFactory();
ELContext context = fctx.getELContext();
ValueExpression createValueExpression = expressionFactory.createValueExpression(context, "#{pageFlowScope.PageFlowScopeBean}",PageFlowScopeClass.class);
PageFlowScopeClass pageFlowScopeInstance =(PageFlowScopeClass) createValueExpression.getValue(context);

ADF : Drag and Drop Between Collections(Tables) – Step by Step

ADF provides ability to Drag and Drop items from one place to another place on the page. This simple tutorial will guide how to achieve this.

Requirements
  • JDeveloper 11.1.2.2
  • Oracle XE database with HR Schema in place.
Use Case
  • Two tables are created on the page. Countries Table and Selected Countries Table.
  • Rows are dragged from Countries table and dropped into Selected Countries Table
  • Row should get added to the Selected Countries Table when dropped into it.
  • Row should be deleted from source Countries table when successfully dropped into destination Selected Countries Table.


Setting up Business Components


First we will be creating a new table SELECTED_COUNTRIES which is exact replica of COUNTRIES table in HR Schema.
After this Create Entity object and View Object of both the tables(SELECTED_COUNTRIES and (COUNTRIES)  and add these to AppModule.
From AppModule window -> Data Model Tab, shuttle the two newly created View Objects(SelectedCountriesView and CountriesView).
Below are the two VO which you can see. We have already shuttle them. (Please ignore “Rest of the VOs” in this screenshots and also in rest of screenshots in the post)
Creating JSF Page
Now create a new Jsf page in ViewController project. Lets give this page name – DragDropExample.jsf
Select One Column Footer (Stretched with Splitter) theme of the page as shown below.
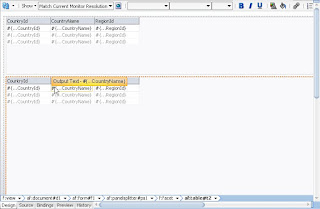
Stretch the splitter to be in the middle of the page which divides the page in two halves.
Now go to Data Control . Drag n Drop CountriesView1 to the first part of the page and create a read only table with single row selection.
Do the same thing with SelectedCountries data control on the second half of the page and create read only table with single row selection.
After this the page will look like below screenshot.
Adding ADF Drag – Drop components to our tables.

Now its the time to add drag and drop behavior to our tables so that we can drag from Countries table and drop in Selected Countries table.
From the Component Palette select the drag source and drag it under Countries table in structure window.
In the Drag Source Property Inspector give these values.
DragDropEndListener :- This is a method call to managed bean, which perform the tasks on the Source Collection after it has been dragged. For example , in our demo , we need to delete the row when it is being drag and dropped to the target SelectCountries table. So the code for deleting the row from the source collection goes into this method.
For this we need to create a new Managed Bean.
Lets create a new Bean by clicking arrow on DragDropEndListener field like below:
And create a new method named endListener and make EL of DragDropEndListener to
 #{pageFlowScope.DragDropDemo.endListener}
We are all set on source side.
Now lets do the destination table side things.
From Component Palette selection Collection Drop Target. Drag this under SelectedCountries Table. This will pop up a window asking for the drop target. This again needs to be a method from managed bean. Make a new method named “dragRow” like below screenshot.
Below will be the values of Collection Drop Component in Property Inspector.
Model name needs to be same as Discriminant in drop source component. This is used in the dragRow method we will look below.Full Method name :- DragDropDemo.dragRow

And below is utility method addNewRow.
Full Method name :- DragDropDemo.addNewRow

And finally below is the code for DragDropEndListener method.
Full Method Name : DragDropDemo.endListener

Note that CountriesView1Iterator and SelectedCountriesView1Iterator used in the code are actual executable in DragDropExample.jsf. Below is screenshot for same.

Now we are all done. Do a Save all and compile everything and run the page DragDropExample.jsf.

You will see that you can drag n drop a row from Countries table to Selected Countries table. The row gets added on drop and gets deleted from the source table.

Hope this tutorial was helpful. Please feel free to ask any questions or doubts if you have any.

Happy Learning !!

Rohan Walia