Requirement -provide detailed step-by-step procedure for preparing your system for the installation of Oracle WebCenter 11g and Oracle UCM 11g on 64-bit Linux environment.
- Pre-requisites for Oracle WebCenter 11g and Oracle UCM 11g Installation
Check the following pre-requisites on your system where WebCenter and UCM installation need to be done –
-
Before starting the installation, the software bundles of the following products need to be available.
|
#
|
Product Name
|
Version (As used in the project)
|
|
1
|
Oracle Database
|
11g Release 1 or 2
|
|
2
|
Repository Creation Utility (RCU)
|
11.1.1.4
|
|
3
|
JDK
|
1.6.0_26
|
|
4
|
Oracle WebLogic Server
|
11g Release 1(10.3.5.0)
|
|
5
|
Oracle WebCenter Server
|
11g Release 1 (11.1.1.4.0)
|
|
6
|
Oracle UCM Server
|
11g Release 1 (11.1.1.4.0)
|
-
Creating WebCenter and UCM Group/User for installation
-
Log in as the ‘root’ user.
-
Create a Group (each for WebCenter and UCM installations) and an User (each for WebCenter and UCM installations). Assign the appropriate User to the respective Groups for the WebCenter and UCM installations.
-
Checking Kernel Parameters
The following are the steps that needs to be followed –
-
Log in as the ‘root’ user.
-
Add the lines below to /etc/security/limits.conf file:
<User> soft nofile 4096
<User> hard nofile 4096
Here, Replace <User> in the above mentioned lines with the WebCenter or UCM installation user.
-
Restart the system.
-
Checking /tmp Space
The following are the steps that needs to be followed –
-
Log in as the ‘WebCenter or UCM installation’ user.
-
Make sure /tmp directory is writable and has atleast 60 MB of disk space for WebCenter and UCM installation.
-
Run ‘df –h’ and verify of value of /tmp >=60 MB
-
Preparing your system for WebCenter and UCM installation
You need to install the following products on your system before you run the WebCenter and UCM installation –
The following sub-sections elaborate the installation details for each of the above steps.
- Repository Creation Utility (RCU) Schema Creation
WebCenter Portal and UCM require that certain schemas exist in the database prior to installation. You must run Repository Creation Utility (RCU) to create the schemas in the database.
The following pre-requisites need to be done on your system before you run the RCU for creating schemas –
-
You must create an Oracle Database Instance (11g Release 1 or 2).
-
All the below required DB parameters need to be updated and these are only specific to RCU. Execute the below given SQL query using TOAD Editor/SQL Plus before you run the RCU installation.
alter system set open_cursors=500 scope=spfile
alter system set processes=500 scope=spfile
alter system set sessions=500 scope=spfile
This section elaborates the step-by-step procedure to create schemas in the database –
Step 1:
-
Unzip the RCU installable file to a directory (Say, rcuHome).
-
Navigate to /rcuHome/bin directory and open a terminal window.
-
Enter the following command:
./rcu
-
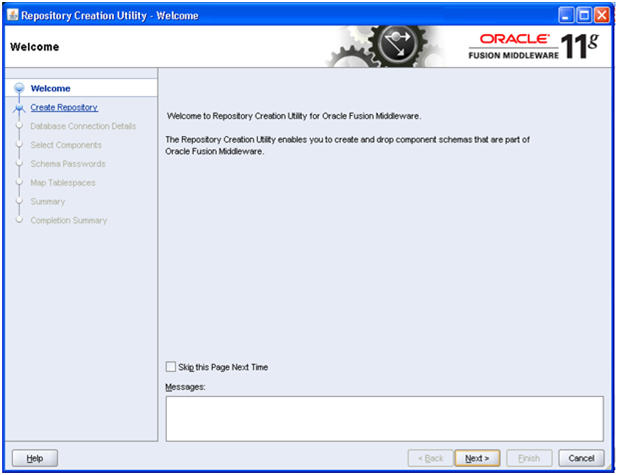
The RCU Welcome Screen appears.
-
Click Next to continue.
Step 2:
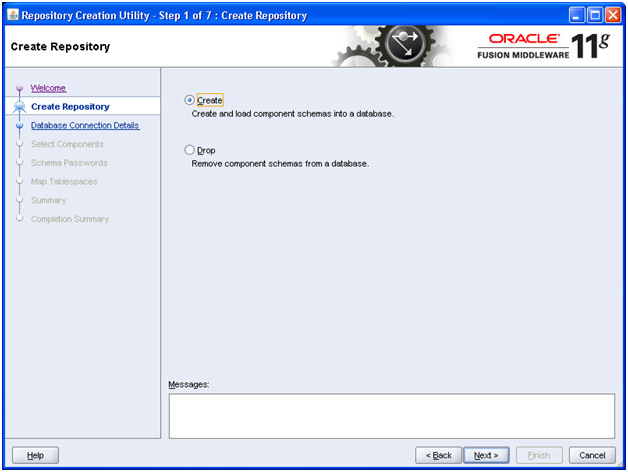
Step 3:
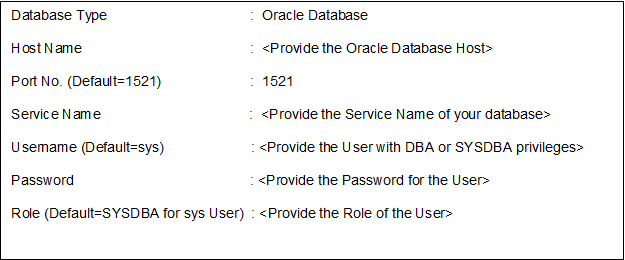
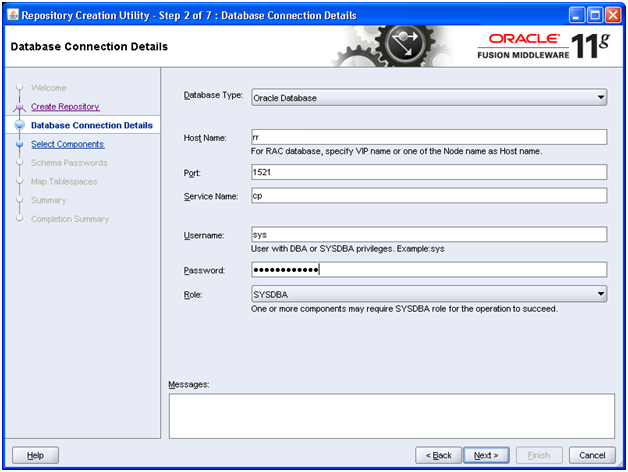
Step 4:
-
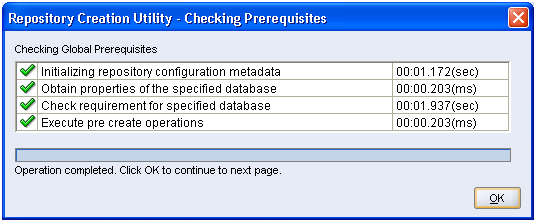
The Checking Prerequisites Screen appears, indicating the progress of the installer establishing the connection with the specified database.
-
When the operation completes, click OK.
Step 5:
-
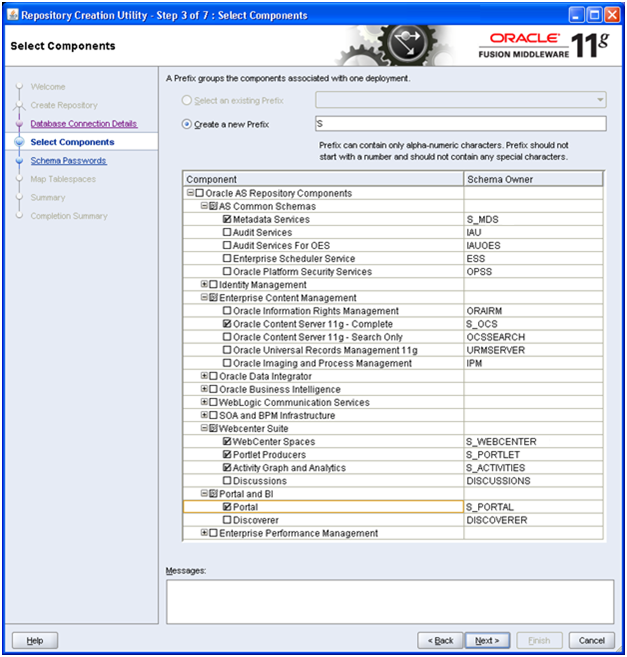
Specify a schema prefix and select the components for which you want to create schemas in the database.
-
The default new prefix is ‘DEV’. If you want to create a new prefix for your schemas, select ‘Create a New Prefix’ and specify a new prefix name in the field. (E.g. S).
-
Select the following components (marked in bold). The components are selected here as per the project requirement.
|
Components
|
Schema Owner
|
Dependencies
|
|
As Common Schemas
|
|
|
|
-Metadata Services
|
S_MDS
|
None
|
|
Enterprise Content Management
|
|
|
|
-Oracle Content Server 11g-Complete
|
S_OCS
|
None
|
|
WebCenter Suite
|
|
|
|
-WebCenter Spaces
|
S_WEBCENTER
|
None
|
|
-Portlet Producers
|
S_PORTLET
|
None
|
|
-Activity Graph and Analytics
|
S_ACTIVITIES
|
None
|
|
Portal and BI
|
|
|
|
-Portal
|
S_PORTAL
|
Oracle Portlet Producers (prefix_PORTLET)
|
Step 6:
-
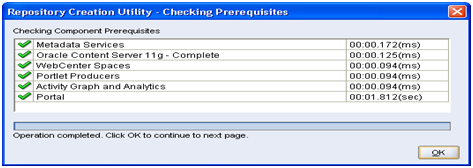
The Checking Prerequisites Screen appears, indicating the progress of the component pre-requisites check for creating schemas.
-
When the operation completes, click OK.
Step 7:
-
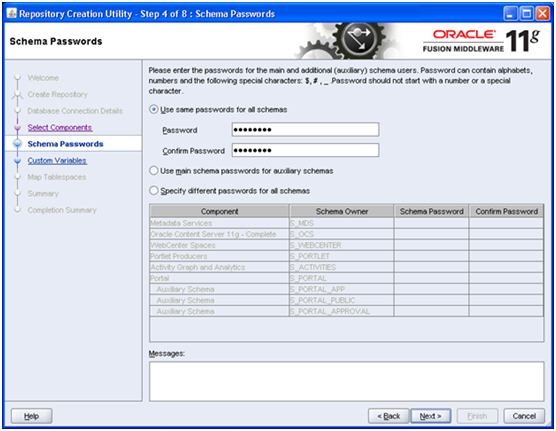
Specify the passwords for your schema owners.
-
Select ‘Use same passwords for all schemas’ to use a single password for all schemas and their auxiliary schemas. This option is selected by default.
-
Enter the password and confirm password again.
-
Click Next to continue.
Step 8:
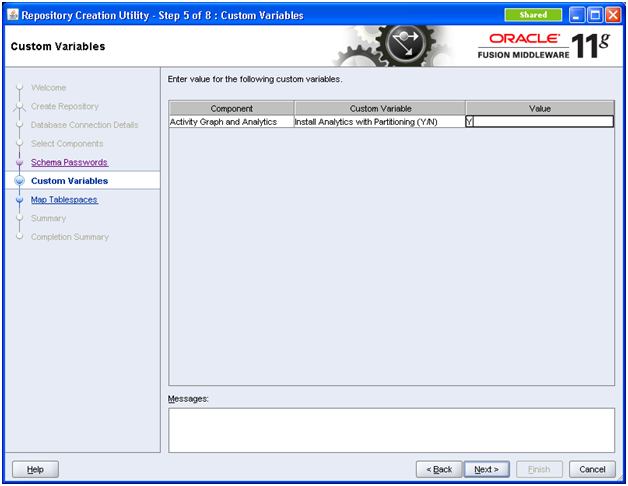
Step 9:
-
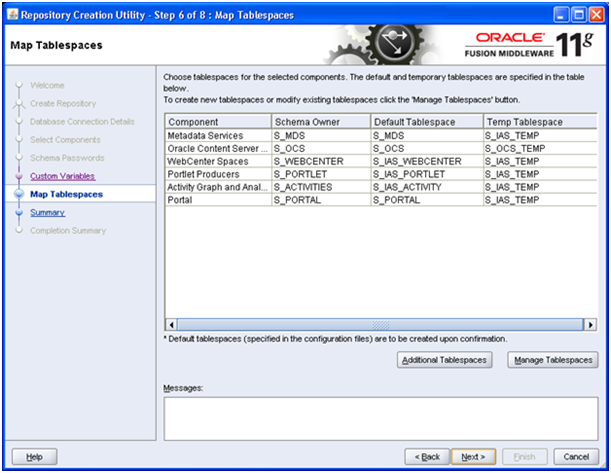
The Map Tablespaces Screen appears.
-
In this installation, you accept the default and temporary tablespaces for the selected components.
-
Click Next to continue.
Step 10:
-
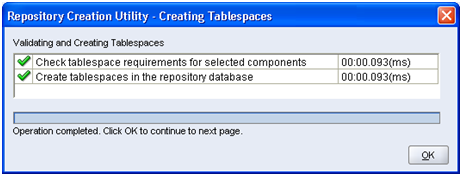
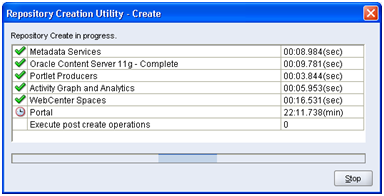
The Creating Tablespaces Screen appears, indicating the progress of the tablespaces creation.
-
When the operation completes, click OK.
Step 11:
Step 12:
- JDK Installation
The JDK must be installed on your system before you install Oracle WebLogic Server. It is recommended that you use the Sun JDK if you are installing in a development environment. Typically, this environment provides a more relaxed security configuration and enables you to auto-deploy applications. In a development environment, boot.properties is used for user names and passwords and polling is used for application deployment.
If you are installing in a production environment, it is recommended that you use the Oracle JRockit JDK. Production environments are for applications running in their final form. Full security is enabled and applications may be clustered or use other advanced features. In this mode, user names and passwords are required and polling is not used for application deployment.
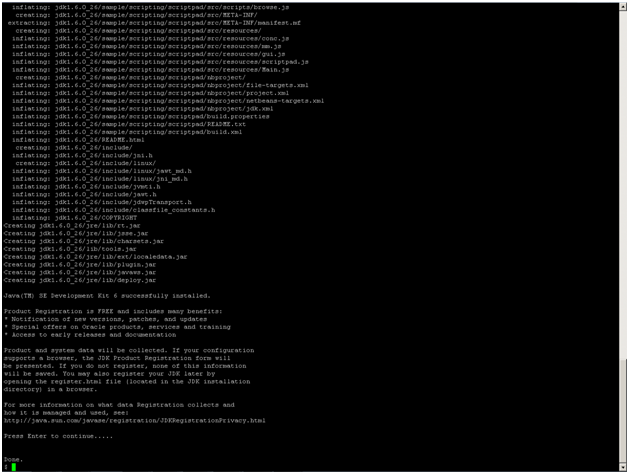
This section elaborates the step-by-step procedure to install Sun JDK –
Step 1:
-
Navigate to the directory where you want to install the software. (Say, /usr/local/apps). In this installation, Sun JDK installable file is placed at the same location where you want to install the software.
-
Change the permission of the file you downloaded to be executable. Open a terminal window and enter the following command:
chmod a+x jdk-6u26-linux-x64.bin
Step 2:

Step 3:
- Oracle WebLogic Server Installation
WebCenter and UCM runs on Oracle WebLogic Server 11g. You must install Oracle WebLogic Server before you install WebCenter and UCM. If you do not already have one, follow the instructions in this section to install Oracle WebLogic Server.
General Note to the Administrators:-
The Installation window prompts you to enter the number associated with the choice or by pressing Enter to accept the default. Following are the choices:
-
Exit – to exit from the installation procedure in response to any prompt.
-
Previous – to review or change the selection.
-
Next – to proceed.
When you see a right arrow (->) associated to a choice on the screen during the installation process, it depicts that the corresponding choice is selected by default by the installer. Type Next and press Enter to accept the default selection (or) enter the number associated with the choice for selecting the option of your choice.
When you see a cross symbol (x) associated to a choice on the screen during the installation process, it depicts that the corresponding choice is selected by default by the installer. Type Next and press Enter to accept the default selection (or) type the number that appears inside the [ ] brackets and press Enter to deselect the default selection (or) enter the number associated with the choice for selecting the option of your choice.
Step 1:
-
Navigate to the directory where the WebLogic installable file is placed. (Say, /usr/local/apps/wcdownloads)
-
Open a terminal window and set the JAVA_HOME environment variable on your system. Enter the following command:
JAVA_HOME=/usr/local/apps/jdk1.6.0_26; export JAVA_HOME
Here, JAVA_HOME is the installation location of the supported JDK you installed for your platform.
-
Run the WebLogic executable file. Enter the following command:
java –Xmx1024m –jar wls1035_generic.jar –mode=console
-
The wls1035_generic.jar file is extracted and the installation process begins.

Step 2:
Step 3:
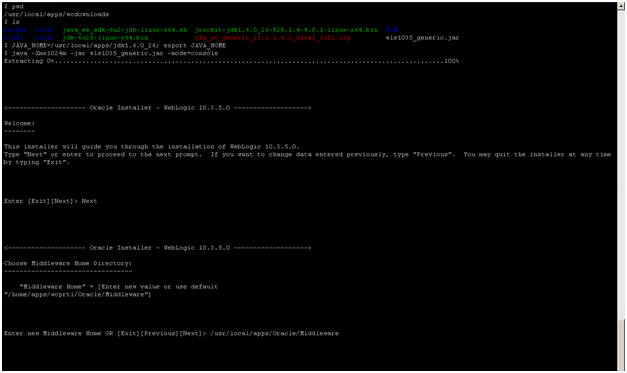
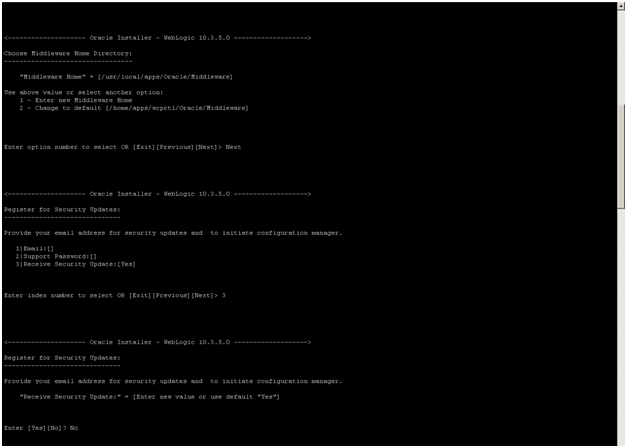
-
The Choose Middleware Home Directory prompt is displayed.
-
Specify the desired location of your new Middleware Home directory.
-
Type the new Middleware Home. Say, ‘/usr/local/apps/Oracle/Middleware’ and press Enter to continue.
Step 4:
Step 5:
-
The Register for Security Updates prompt is displayed.
-
Select whether or not you want to receive the latest product and security updates.
-
If you do not wish to receive security updates and to initiate configuration manager, type 3 and press Enter to continue.
Step 6:
Step 7:
-
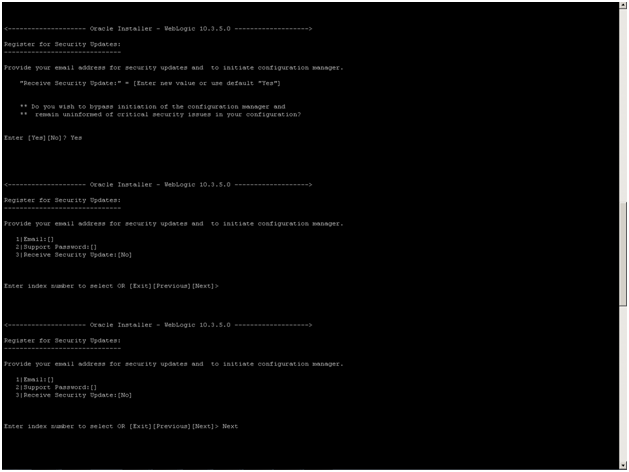
If you choose not to receive anything, you will be asked to verify your selection before continuing.
-
Type Yes and press Enter to confirm your selection.
Step 8:
Step 9:
-
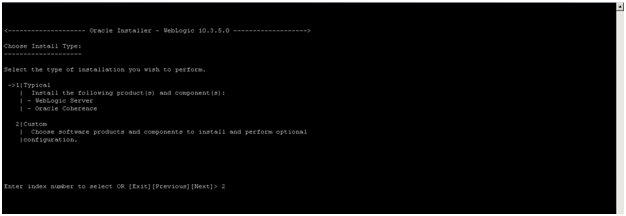
The Choose Install Type prompt is displayed.
-
The Typical installation type is selected by default. In this installation, you must select the Custom installation type to select the products and components you want to install.
-
Type 2 and press Enter to continue.
Step 10:
|
Products
|
Components
|
|
WebLogic Server
|
Core Application Server
|
| |
Administration Console
|
| |
Configuration Wizard and Upgrade Framework
|
| |
Web 2.0 HTTP Pub-Sub Server
|
| |
WebLogic SCA
|
| |
WebLogic JDBC Drivers
|
| |
Third Party JDBC Drivers
|
| |
WebLogic Server Clients
|
| |
WebLogic Web Server Plugins
|
| |
UDDI and Xquery Support
|
| |
Evaluation Database
|
|
Oracle Coherence
|
Coherence Product Files
|
| |
Coherence Examples
|
-
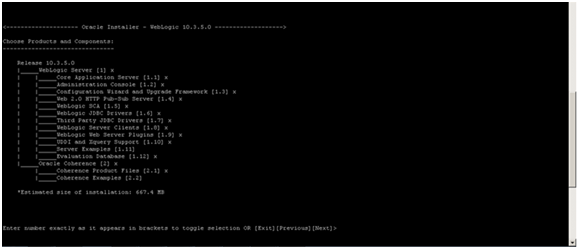
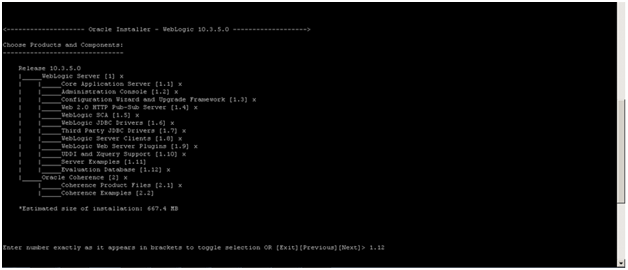
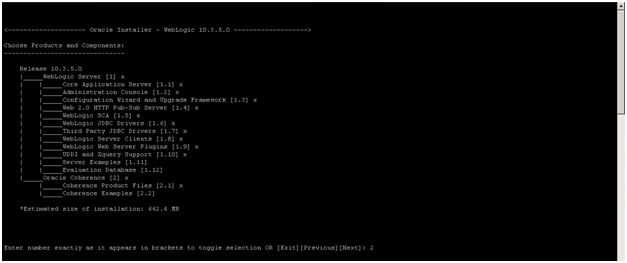
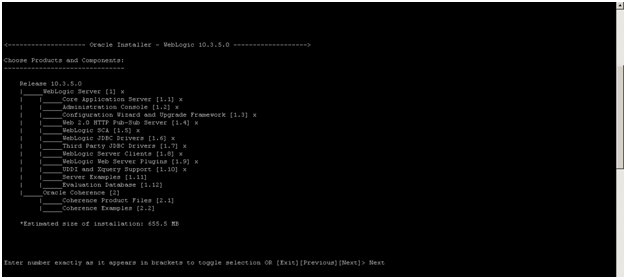
In this installation (as per the project requirement), de-select Evaluation Database component (that belongs to the WebLogic Server Product) and de-select Oracle Coherence product and its components.
-
The de-selection of the products and the components for this installation is illustrated in the below steps with necessary screenshots.
Step 11:
Step 12:
Step 13:
Note:
The following table shows the products and its components selected for this installation (as per the project requirement) –
|
Products
|
Components
|
|
WebLogic Server
|
Core Application Server
|
| |
Administration Console
|
| |
Configuration Wizard and Upgrade Framework
|
| |
Web 2.0 HTTP Pub-Sub Server
|
| |
WebLogic SCA
|
| |
WebLogic JDBC Drivers
|
| |
Third Party JDBC Drivers
|
| |
WebLogic Server Clients
|
| |
WebLogic Web Server Plugins
|
| |
UDDI and Xquery Support
|
Step 14:
-
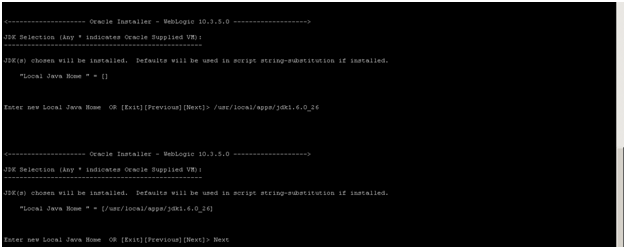
The JDK Selection prompt is displayed.
-
Select the JDKs you want to install.
-
Type 1 and press Enter to add the local JDK (SUN JDK 1.6.0) that you installed on your system.
Note:
If you notice to see open JDK (/usr/lib/jvm/java-1.6.0-openjdk-1.6.0.0.x86_64) is selected by default by the installer on this screen (as shown in the screenshot below). You must de-select the open JDK once the process of adding local JDK is done to proceed with the installation process.
It is recommended that you use the Sun JDK if you are installing in a development environment and if you are installing in a production environment, it is recommended that you use the Oracle JRockit JDK.
The 32-bit WebLogic executable files are bundled with the appropriate JDK version. If you use the 64-bit WebLogic installer, you will need to invoke the installer with a supported JDK for your platform.

Step 15:
Note:
JAVA_HOME is the installation location of the supported JDK you installed for your platform.
Step 16:
Step 17:

Step 18:

Step 19:

Step 20:

Step 21:
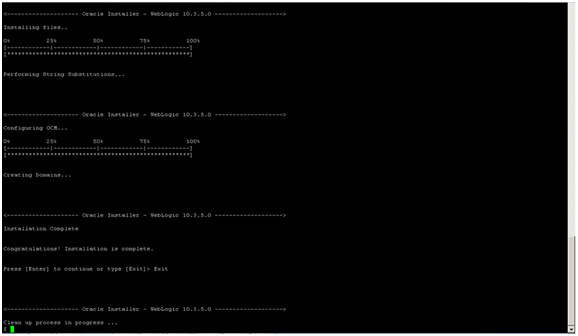
-
The installation process begins. Progress bar shows the % installation of the component.
-
Once the installation is complete the following message is displayed, ‘Congratulations! Installation is complete’.
References
- Oracle Fusion Middleware Repository Creation Utility User’s Guide 11g Release 1 (11.1.1)


